Wednesday 31 May 2023

 Chine panels in place ready to glue


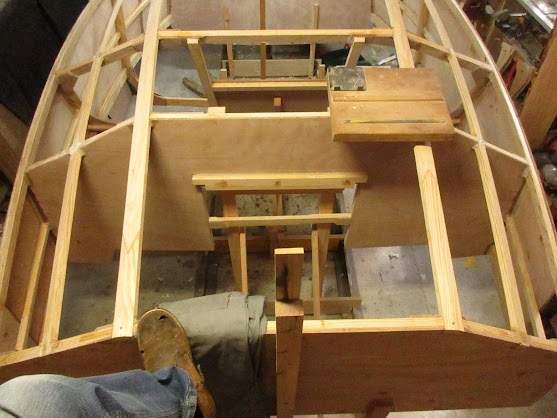
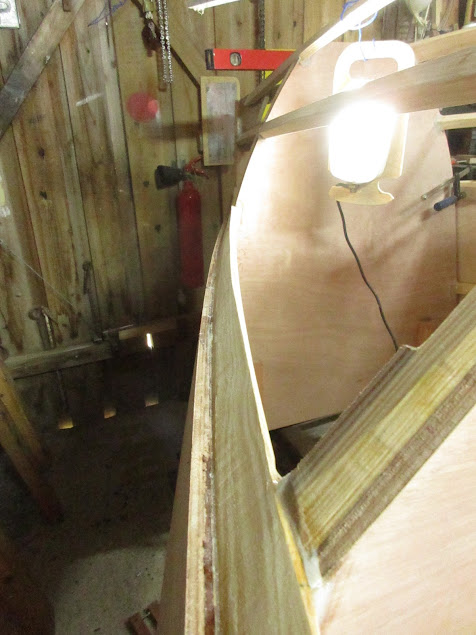
Today both chine panels were clamped in position and are learning the shape they have to take and live in for the rest of time , some bracing was added between bulkheads D and E because there is considerable force in shaping the plywood to the frames and stringers,  hence the wait while they take a "set"


temporary bracing


Monday 29 May 2023

 The stem in preparation for the next planking


The last few days have been taken up with finishing the stem and dry fitting the planking and bending it into place and making note of where the lands are and then checking the fairness of the lines, the curvature of the ply and making sure that the sides are symmetrical to each other in distance from the centreline and also that the angles port to starboard are the same along the length - wood of course had different density, elasticity, bending modulus so there was some difference between the 2original stringers which were bonded on which is now sorted out - I made a plywood pattern of the curve after much fitting and bending of the chine panel to the hull - and bent a batten to match it checking angles and curve and built a laminated shape out of epoxy and wood, the battens just have to be feathered out as they move towards the stern, then the next chine panels can go on.Sorry there were no updates the past few days  - but it took time for each application of epoxy to cure, before the next part of the operation could carry on.


Sorry about the quality of these following pics but there was a lot of bending and measuring and not much tech photoing going on


Friday 26 May 2023

 Todays addition, a crash bulkhead
NOTE TO SELF, the first of "its not that much extra weight"

Today I added a crash bulkhead. at the bow  

I think this will also help to keep the hull panels fair when I fit them as the stringer takes a lot of force when you bend it into place  - it does not add much weight, but that is the problem,  - if you keep adding things, thinking - its not that much extra weight, its not that much extra weight, its not that much extra weight, eventually it is a SHED LOAD of extra weight


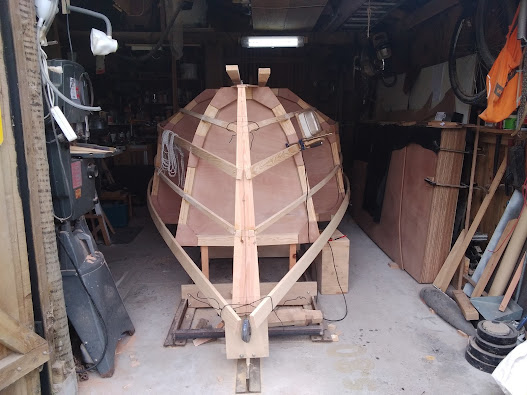
 the BIG small boat


here is a pic to keep you informed while the bent planking adventure continues


Thursday 25 May 2023

 Building hint for Setka builders doing planking

You maybe thinking -  if you have ever experienced a build with epoxy How? I manage to get the sized planking sheets each 2.5m long easily to where they should be with no mess no fuss - especially if you have experienced the tendency of epoxy glued bits to slide around, epoxy is a slippery beast.

well here it is my secret 

you cut the pieces to fit , no need to cut them oversize and trim, though for the hullsides I cut the bottom a little longer at the sheer. Then once it is dry fitted and clamped exactly  where you need it you drill some 1.8mm or 2mm holes through the plywood at the first chine, I do 4 holes spaced out on a big sheet  of ply  mark the holes on the ply, remove the panel, then prewet the ply , and stringers, apply thickened epoxy to the stringers, and then with someone holding the far edge and them not touching the prewet  ply to the stringer - you place your edge of the ply where you want it, push a finish nail through the hole in  the ply into the hole in the stringer, the ply then hangs from the nail, clamp with a spring clamp, bend ply to shape, next nail in, clamp, bend ply to shape nail in clamp, till you get to your helper -the ply hangs from the nails no movement-  then you are free to clamp with proper clamps, screw in screws, clean etc, the panel will stay where you originally had it, during dry fitting -  no slipping no stress and a happy helper, it helps to mark the stringer holes too , I do this technique to line up ply bulkheads on frames as well-  one nail per corner, you can pull them out once the epoxy sets up, or leave them in until cured and use a soldering iron to heat and remove the nail. easy!


nail in after dry fit, no glue yet


and after glueing and screwing and clamping , you can mark above the nail hole on the stringer, so you can find the hole easier too

If this helps you or you think it will help,  leave a comment, (they remain private and do not appear - if you want ) and if you would like more hints please ask

Wednesday 24 May 2023

 Templating for the next hull chine plates


Today was more hull plating, filleting and glueing and we also made a template for the next chine to get the most economical use of the 10mm plywood sheets


Monday 22 May 2023

 Planking continues but rain interrupts play

Today planking for the aft hull sections was cut, but then it started raining which means that we could not epoxy pre-wet the hull panels and then glue them on , as pre wetting with unthickened epoxy  has to be done outside on sawhorses as there is just not enough space inside the shop - what was reassuring is that the panels are interchangeable port to starboard


here are some updated pictures of the inside filleting


I am going to use a spirit level to check the bevels on the hull bottom stringers on both
sides are at equal distance from the strongback -
therefore the hull bottom should be flat port to starboard 


hull plating is screwed on with 4x25mm stainless screws as well as bonded with epoxy thickened with 403, 404 and fumed silica


the progressive bevel from bulkheads D to E (it looks like there is a bump but thats an illusion) it  has a changing shape the whole length of the hullside that I cannot see could be achieved with a power plane, for me a hand plane is an indispensable tool for boatbuilding


Thursday 18 May 2023

Beveling the frames and stringers 


One side of the hull has been beveled, and tomorrow the other side will be beveled 
and that means that it looks good to do planking this weekend 💃💃💃💃💃💃💃💃


btw my self-made shop-made planes performed the best,
even after I had a marathon plane sharpening break


Wednesday 17 May 2023

Monday 15 May 2023

 The "beer" planks go on


Today the bottom stringers went on, they bend up down, left and right and also twist along their axis as they reach the stem - the final result is that they are both symmetrical which is good. 


the whiskey is saved for the planking later this week


Tuesday 9 May 2023

 Chamfering the stringers


It was a meditative day in the workshop, I spent the day "breaking" the inside edges of the stringers using my dads old Stanley No. 51 and my antique Stanley no 53 spokeshave and sometimes my 9 1/2 A block plane.
There was a gentle rain sounding against the roof, the smell of wood, no dust, no powertool noise, no screaming router bits, no cables, just the joy of using super sharp, well setup, proper tools, and hearing the wood turn into curly shavings.

That is the joy of doing things for yourself , you can slow down and enjoy the journey.


  70mm sheerclamp

A thing that was once living does not necessarily want to follow a line drawn on a plan - the 70mm sheerclamp is settling in to its new position with a little persuading and maybe some further tweaking , luckily we have had some really humid weather so the wood is more forgiving but that is not a great situation for epoxy bonding.


little wooden blocks are screwed to the frame to hold the stringer while it curves to its new shape, this allows the wood to follow fair curves without the influence of clamps that hold it rigid and can possibly create sharp transitions. IMHO, 


ratchet straps holding the 50mm stringers from previous days


Sunday 7 May 2023

 More stringers


 notching the frame


keeping the cutout bits to use as templates for the other side


much measuring and marking to get these shapes


using ropes and clamps to get the stringers to seat well


 Tiller has been shaped